Sometimes we need to test a new feature in our mobile app. For example, if you want to see how new design will affect retention and DAU, whether users like it or not. AB Testing helps us here.
In a simplified form, it looks like this: on the backend side, administrator exposes which part of the users will see option A (new design), and which part is version B (old design). The client-side requests the server which option, A or B, it should show. And then a regular if- or switch- check starts the necessary code.
Fortunately for many mobile developers, the multifunctional service Firebase provides among other the possibility of AB-tests.
To create an experiment open Firebase console.
Open your project. If you do not have a project yet, create one.
For clarity, I will add an experiment to change the color of the UI element in my stopwatch project.
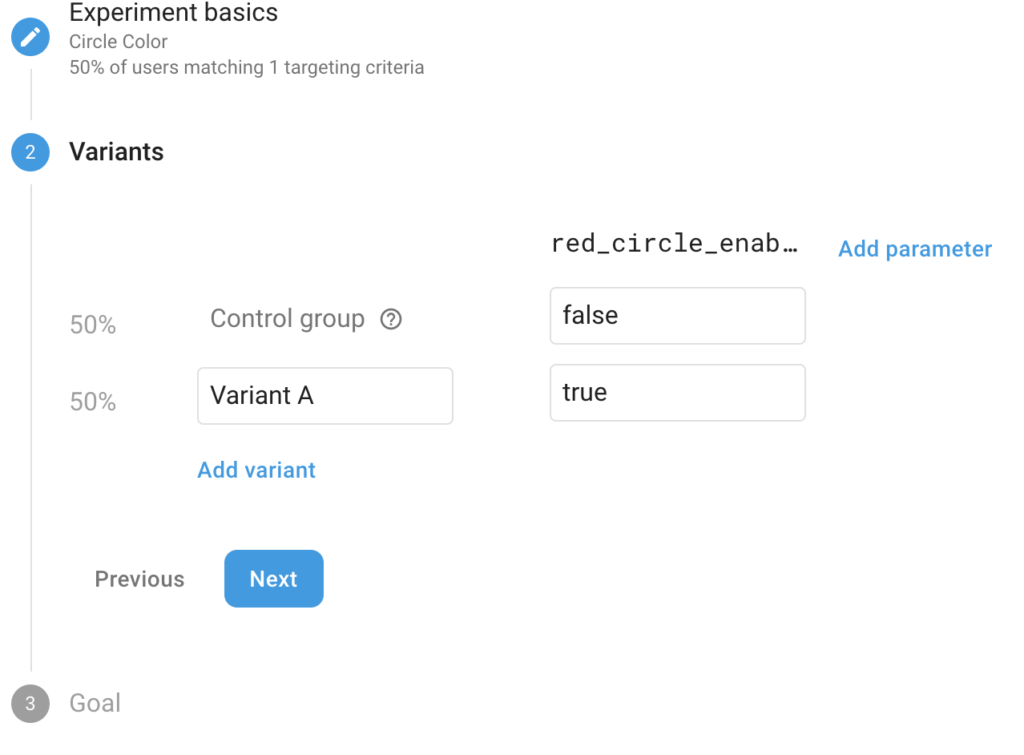
So, on the left, in the section Grow select A/B Testing and then Create experiment->Remote config. Enter the name of the experiment, description, select our application and enter the percentage of the target audience

Press Next. We may add not only two, but several options. In my case, two is enough. Now add parameter red_circle_enabled. Set values for created varinats:
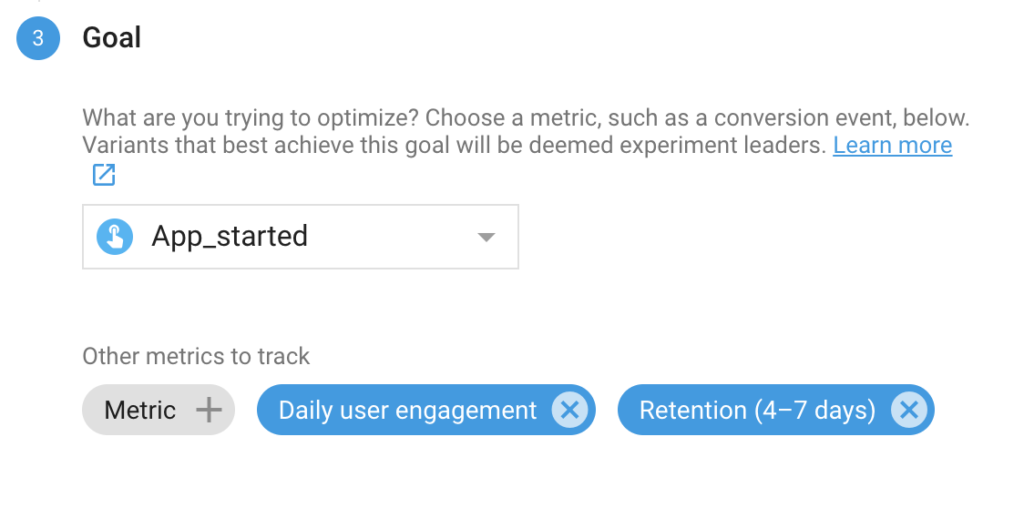
It remains to choose the goals by which we will monitor the effectiveness of the tests:
Press Review and start experiment.
Now we need to implement A/B logic on client side.
In Codelabs there is a good tutorial how to make it on Android
Everything we need belongs to com.google.firebase.remoteconfig, so make sure you have added next dependency in your build.gradle:
implementation 'com.google.firebase:firebase-config:15.0.0'
Next, initialise Remote Config instance where you will implement A/B test logic (e.g. MainActivity):
FirebaseRemoteConfig mFirebaseRemoteConfig = FirebaseRemoteConfig.getInstance();FirebaseRemoteConfigSettings firebaseRemoteConfigSettings =
 new FirebaseRemoteConfigSettings.Builder()
 .setDeveloperModeEnabled(true)
 .build();
// Initialise default data
Map<String, Object> defaultConfigMap = new HashMap<>();
defaultConfigMap.put("red_circle_enabled", false);
firebaseRemoteConfig.setConfigSettings(firebaseRemoteConfigSettings);
firebaseRemoteConfig.setDefaults(defaultConfigMap);
fetchConfig();
fetchConfig() requests config data from Firebase
public void fetchConfig() {
    long cacheExpiration = 3600;
    if (firebaseRemoteConfig.getInfo().getConfigSettings()
            .isDeveloperModeEnabled()) {
        cacheExpiration = 0;
    }
    firebaseRemoteConfig.fetch(cacheExpiration)
            .addOnSuccessListener(aVoid -> {
                firebaseRemoteConfig.activateFetched();
                applyRedCircleTest();
            })
            .addOnFailureListener(e -> {
                Log.w(TAG, "Error fetching config: " +
                        e.getMessage());
                applyRedCircleTest();
            });
}
applyRedCircleTest() directly implements the logic depending on the received A/B test value
private void applyRedCircleTest() {
    Boolean redCircleEnabled = firebaseRemoteConfig.getBoolean(Constants.AB_TEST_RED_CIRCLE);
    circleStrokeTextView.setRedCircleEnabled(redCircleEnabled.booleanValue());
}
That’s all! We added the A/B test to the application in 15 minutes using Firebase!